[Github] Considerations and Markdown when writing ReadMe
We have summarized the information needed to create a readme introducing the github repository. Writing a readme is important, but it seems to be something that gets overlooked the moment you think about development. Most developers who manage GitHub well talk about the importance of readme, and I think it's something I don't want to miss, so I'm going to pay attention to it while organizing it on my blog.
The parts that I think must be included (items 1 to 3) are broadly divided as follows.
1. Reason for project plan and description of project
An introduction to the repository is essential because other developers also view my repository when uploading open source code to GitHub or for collaboration. It is necessary to write concisely and intuitively about what content it contains.
2. Function description
If the brief explanation is completed in step 1, it is a good idea to briefly list specific functions. For example, if it is an API repository, write what functions and services the included APIs provide.
3. Development environment and execution method
Write the OS, Language, Framework, Middleware, Compiler, etc. used in development. Since development environments are very diverse, this is a helpful resource when referencing code. This is a necessary element for collaborating developers to save code when necessary and build a development environment on their own computers.
4. License (if required)
If GitHub's code is a public repository, it is open source and can be used by other developers. Therefore, for services that you want to prevent the production of unnecessary copies, you can display the license on GitHub.
+ Badge
Badges can be used in the readme. If you look at the https://shields.io/ site, you can decorate the readme using suggest badges.
Now let’s learn about markdown, which you need to know when writing a readme.
1. When inputting without any symbols
>> The entered text is displayed as is.
2. # for title input
>> If # is entered at the beginning of the text, it has the same effect as a tag. If the number of # is large, the subheading will be small in size. You can use up to 6 # in succession.
# This is an example of title input.
## This is an example of title input.
### This is an example of title input.
#### This is an example of title input.
##### This is an example of title input.
###### This is an example of title input.
This is an example of title input.
This is an example of title input.
This is an example of title input.
This is an example of title input.
This is an example of title input.
This is an example of title input.
3. Creating code blocks
>> Code blocks can be created using tab or using ''' back and forth.
This is an example of a code block.
This is an example of a code block.
This is an example of a code block.
'''
This is an example of a code block.
'''
This is an example of a code block.
코드블럭 예시입니다.This is an example of a code block.
코드블럭 예시입니다.4. Create a BlockQuote
>> To create a BlockQuote, use the > symbol. Can be used overlapping.
> BlockQuote example.
BlockQuote example.
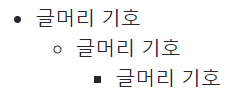
5. Create bullets
>> You can see that the +, *, and - symbols all bring the same output. You can use tab to distinguish hierarchical paragraphs.
+ Bullets
+ Bullets
+ Bullets
6. Create a horizon line
>> By continuously using - to separate paragraphs, you can create a horizontal line that plays the same role as .
---------------------------------
[Git, Git] How to write README.md, example | How to use markdown, grammar: Naver Blog
Comments
No comments yet. Be the first!