Creating a dynamic web page using Spring internalizr (Gradle), IntelliJ, and AWS EC2 - Connect to domain purchase in 8 steps
0. Setting up a domain
If you confirm that the previous steps work well on other devices, set the domain of the completed project.
1. Register elastic IP
Elastic IP has already been registered at the deployment stage. Creates and connects an elastic IP to ensure a unique IP that does not change even if the instance is stopped and restarted.
Spring intializr(Gradle), IntelliJ, AWS EC2를 이용한 포트폴리오 만들기 - 5단계 배포하기(1)
2. Use domain service
2-1. Buy a domain
To purchase a domain, I looked at several sites such as Gabia and doDaddy, but decided to purchase the domain from AWS, which is stable and available at a low price. The price is usually around 10,000 won, but the .link domain I purchased was cheap, around 6,000 won per year.
To briefly explain the purchase process, you enter the route 53 service on AWS. You can go in and purchase a domain, but since it has already been purchased and registered, the picture looks like the one below, but it is normal for the number '1' to be missing when purchasing for the first time!
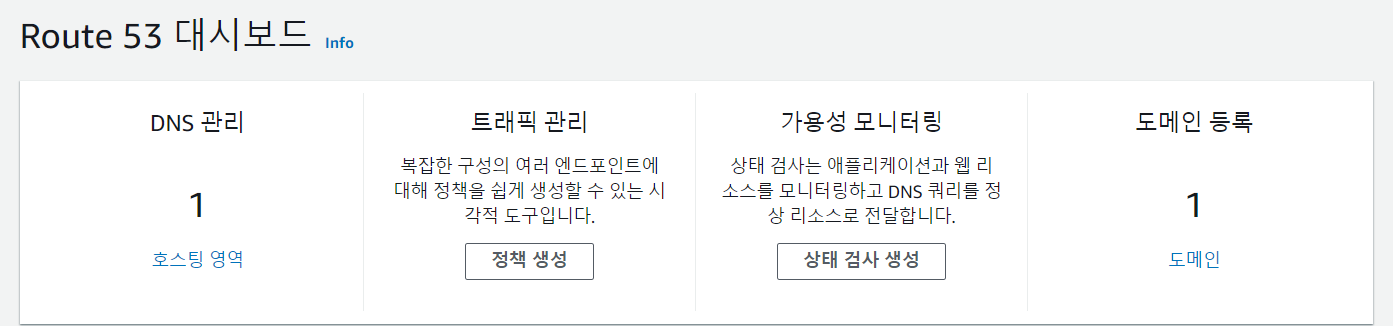
The domain registration process involves writing down the domain name you want, finding out if there is an available domain, and purchasing it. It is recommended that the domain name be in English letters. If it is not a project that involves writing and managing purchases for a long time, disabling automatic renewal prevents costly expenses.
2-2. Connect your domain
To connect to the domain, refer to the picture in 2-1 above and enter the DNS management page. Since you have already purchased it from AWS, you can see that the hosting zone has been created as shown below.
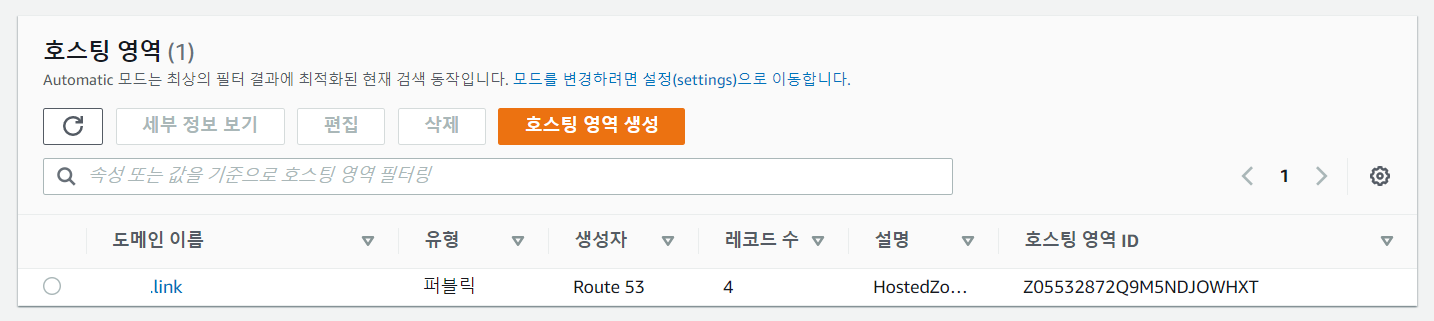
If you click on the domain name, you can see that NS and SOA type records are installed. If you use an external domain service, you must register the NS value as a name server, but if you purchase it from AWS, no separate settings are required.
Create a new record to connect the project created with EC2 to the domain. On the creation page, enter the previously created elastic IP address as the value and register two record names: www and blank. Typically www. This is to create a page where you can enter and enter.
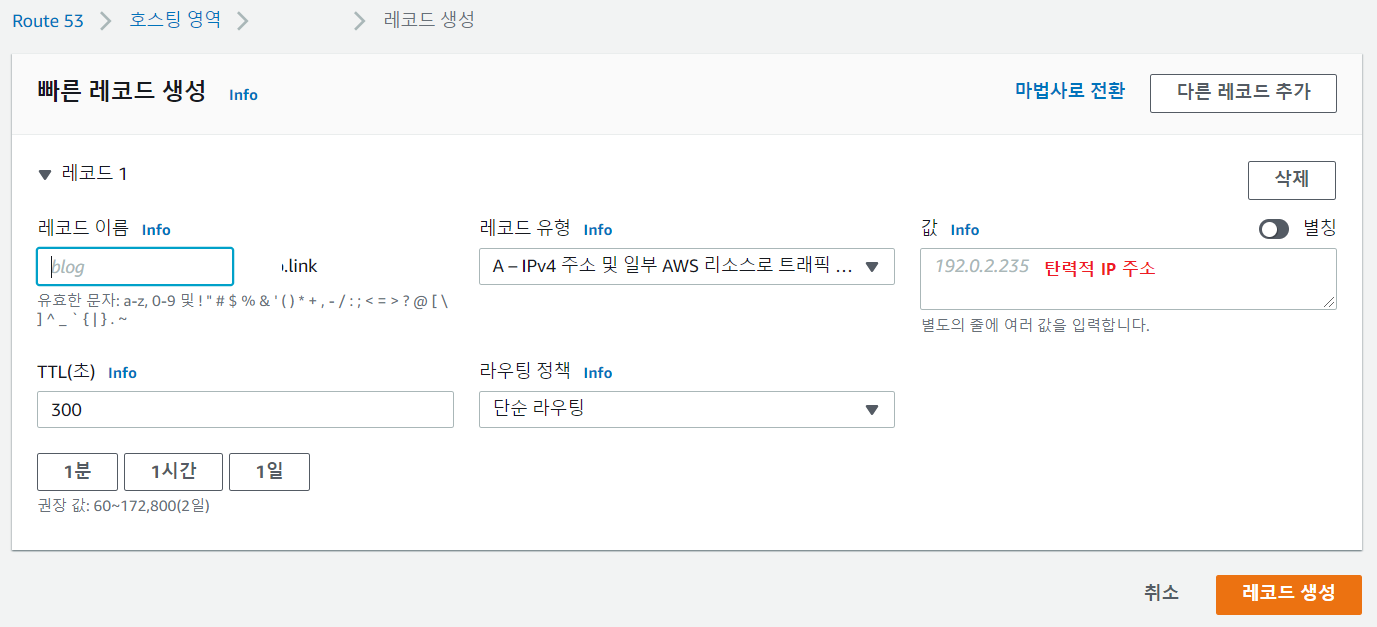
Once creation is complete, enter the domain address and check whether the project window opens properly.
+ What if I registered a domain but can’t connect?
(1) There are several cases that can be considered: when the registered link is different from the input address
(2) When Apache and Tomcat are not installed
Spring intializr(Gradle), IntelliJ, AWS EC2를 이용한 포트폴리오 만들기 - 5단계 배포하기(1)
Let’s check the installation settings by referring to the previous steps!
(3) If the domain is not properly registered
Let’s check whether the domain registration was successful using DNS Checker!
3. Organizing URLs
3-1. Clear project name
Let's delete unnecessary project names to simplify the URL. Previously, I checked with server IP address: 8080/project name, but now I decide to change the server.xml settings to remove the project name.
In the current running environment, Ubuntu 20.04, tomcat9, the server.xml path is in /etc/tomcat9. Here, add within the server.xml file tag with root authority.
+ ".xxx.swp" already exists!
If the session is terminated while writing server.xml without properly modifying it, ".xxx.swp" already exists! An error appears. In this case, you can delete the swp file from the server.xml path and check the server.xml document again.
3-2. Clear port number 8080
Let's delete the unnecessary 8080 port number to simplify the URL.
Enter the iptables -A PREROUTING -t nat -i eth0 -p tcp --dport 80 -j REDIRECT --to-port 8080 command with root privileges. This means interpret the port coming in at 80 as coming in at 8080.
+ [Note] Using other domain services
To obtain a domain, I used freenom, a site that can be used for free. To use the site, you must first find an available domain and sign up. You can select a free domain such as .ga or .tk, but there were some parts that did not work in the Chrome environment, so I ran it in another browser (Naver Whale).
If you want to create a domain called shop.ga, search for shop.ga instead of shop and it will be included in the cart. Once the domain is in the cart, click next to make the next settings and proceed with signing up.
Verify your email and log in again to set up your domain. Go to My Domains > Manage Domain > Manage Freenom DNS settings. Register your elastic IP and add it as shown below to enable connection with the www.domain address.
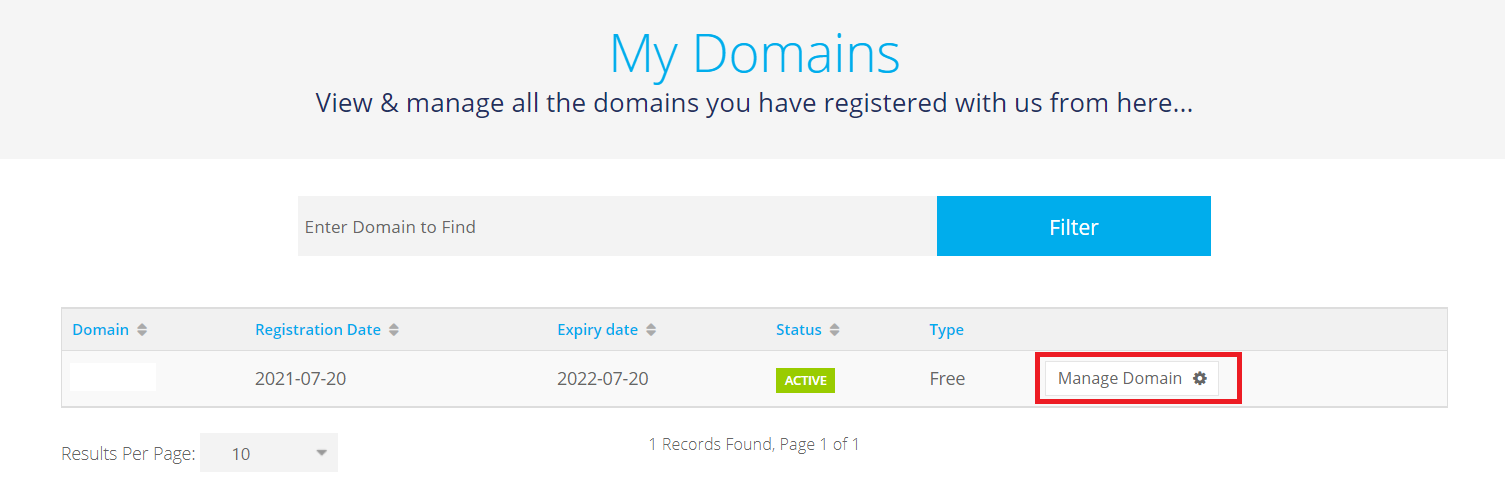

+ Unable to connect to site
After about 5 minutes, I tried to connect to the changed domain, but the connection did not work. I see a lot of people saying it's because it's a free domain, and everyone recommends using a different domain, so I decided not to use the freenom free domain for now.
ec2 기반 웹서버에 freenom을 이용한 무료 도메인 사용하기
.tk(freenom) I see a lot of people these days who can't connect.
Linux Edit the file appears Swap file ".xxx.swp" already exists!
[Amazon AWS EC2] Hide AWS server 8080 Tomcat port
Linux file editing and management
[Amazon AWS EC2] Connect and set Route 53 server domain address to instance
[AWS] Connecting domain and server (EC2)
AWS: Route 53 Fees and Cost Calculation
[Manual][AWS Web Construction for Beginners] 8. Register Route 53 with a free domain and connect ELB
Comments
No comments yet. Be the first!
164 posts in 테크
- 2233D Gaussian Splatting vs Unreal Engine: Two Ways to Build a 3D World — and Where Each One Ships
- 222LLMs Inside Unreal Engine: The New Skills Game Developers Need in 2026
- 220Living With Claude Fable 5: How the Most Capable Model Changes the Way You Actually Work
- 219Luma's Bet: From Video Generator to a Single Model That Thinks in Pixels
- 215The Best AI Video Models in 2026: Types, Differences, and Where This Is All Going