Creating a dynamic web page using Spring internalizr (Gradle), IntelliJ, and AWS EC2 - 6-step deployment (2)
1. Build - Create war file
1-1. Method 1: Use the sidebar
This method applies when war files are first used as packing in Spring initializr. When you select war in the gradle bar, a war file is created in the /build/libs location in the project name path.
1-2. Second method: Using Artifacts
This method applies when jar files are first used as packing in Spring initializr.
In Step 5, we completed the basic setup of the cloud computer for hosting. Now, the created web project must be created as a war file so that it can be recognized and hosted by Tomcat. Let's learn how to create a gradle project into a war file in IntelliJ. For reference, creating bootjar or jar from the gradle bar is supported.
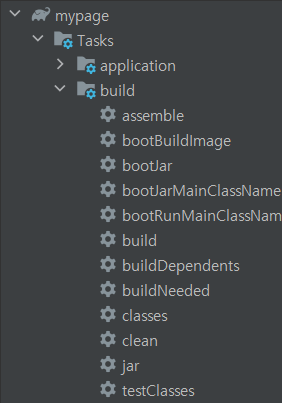
But what we need is a war file. You can build it using Artifacts in IntelliJ. You can build it simply by referring to the following picture.
In File>Project Structure>Artifacts, create Web Application: Exploded>From Modules and Web Application: Archive>For Project:war exploded. At this time, if the Archive name is the same as the project name, a project name.war file is created, and when connecting the URL, a short address can be created, so I modified it. You can modify the war file name later, so you can create it with the default value.
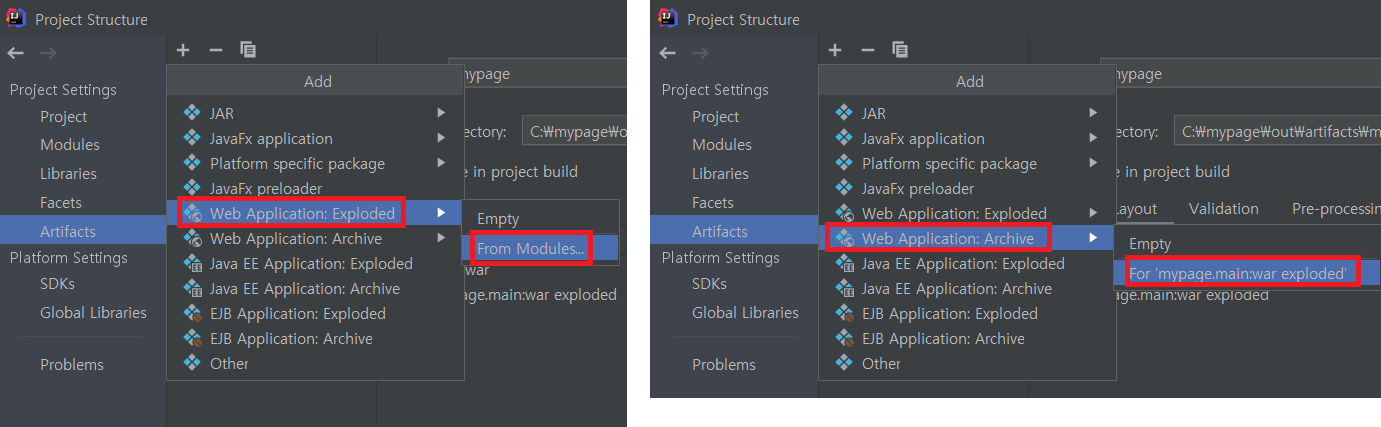
Afterwards, click Build>Build Artifacts to select the menu created earlier in the Archive section and build it. Then, you can see that the /out/Artifacts/created folder name/project name.war file in the project folder has been created.
2. Hosting with Filezila
Let's host the built war file in Filezila, which was set up in step 5.
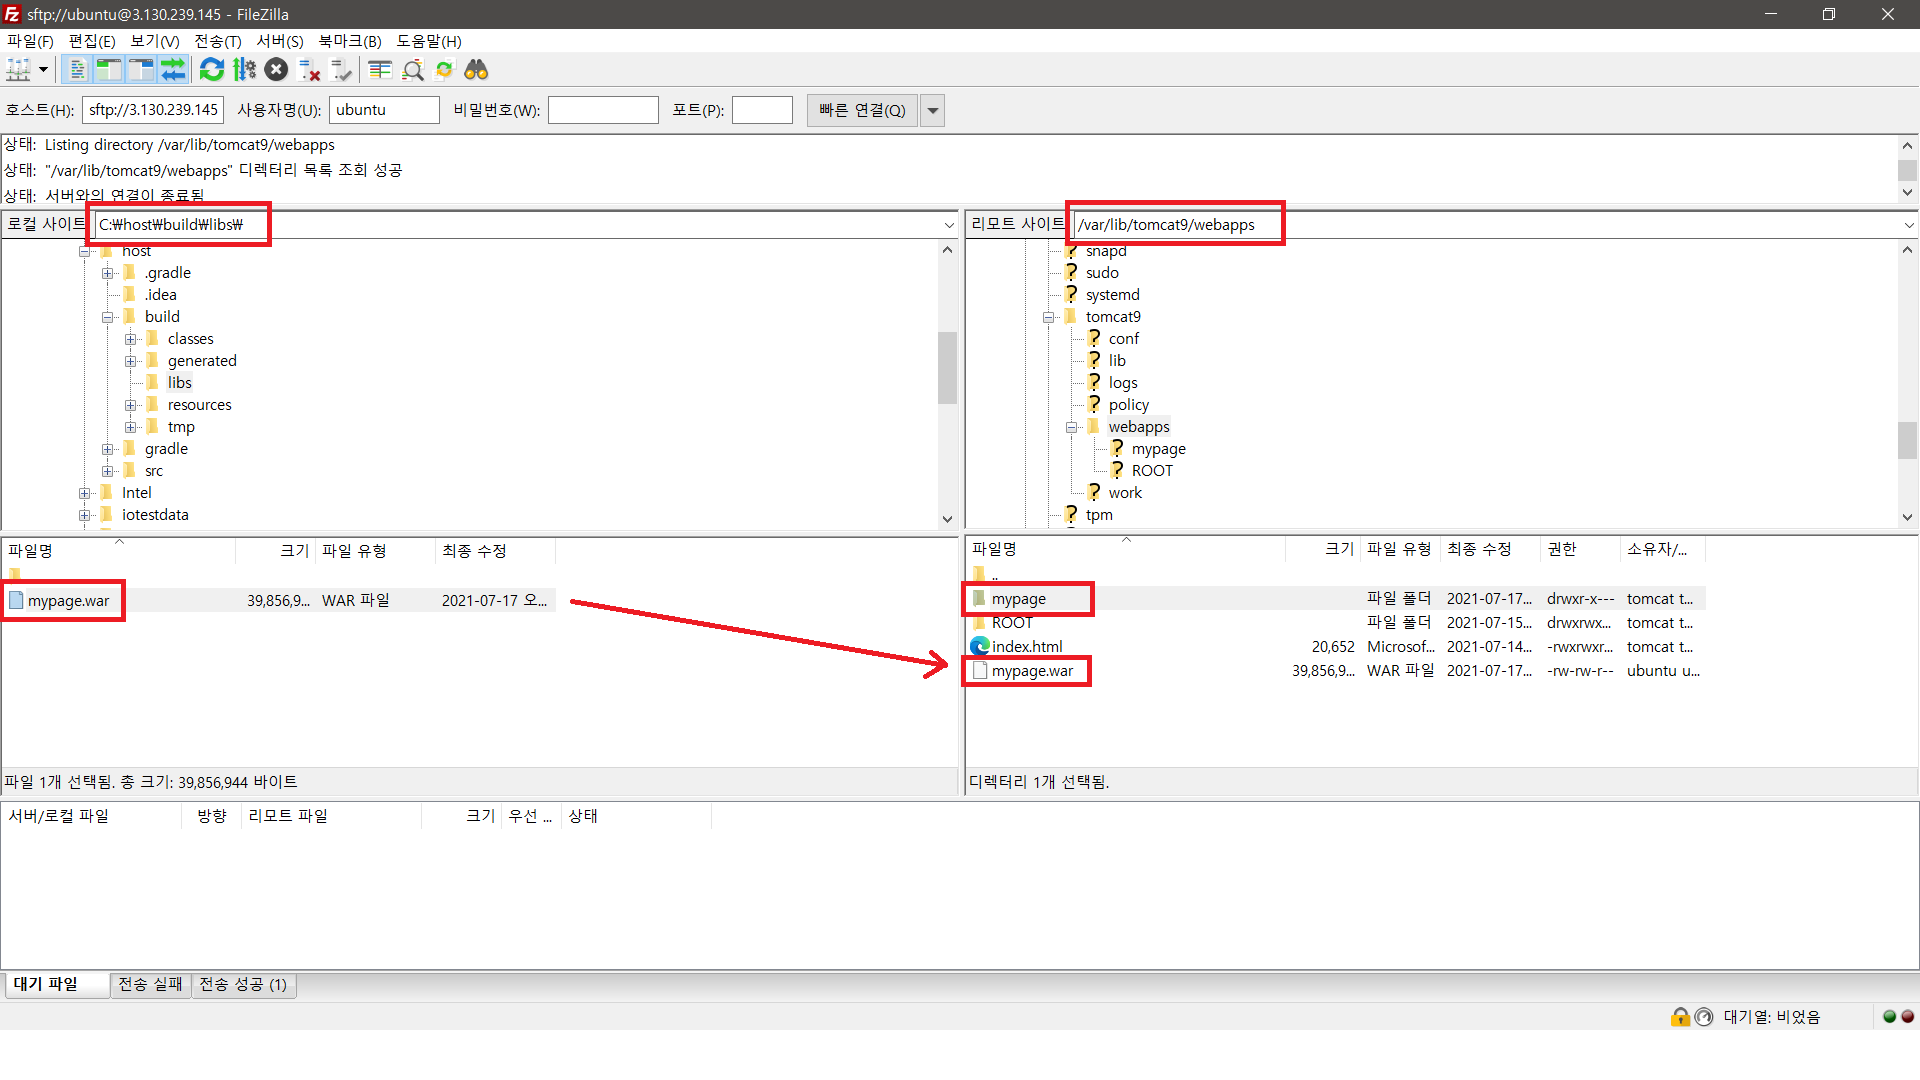
Move the war file from the local directory on the left to the right directory by right-clicking upload or double-clicking. At this time, the right directory corresponds to /var/lib/tomcat9/webapps where tomcat9's webapps are located. If the war file has been moved here, if you refresh after about 5 seconds, you can see that the war file has been unzipped.
Now, with Ubuntu connected through PuTTY, you can see that the project is hosted with public IP: 8080/project name.
Deploying SpringBoot on AWS EC2
Deploying Spring Project on AWS EC2 (using FileZila)
Spring boot war deployment using Gradle
[AWS] [ubuntu] Deploying WAR file on Tomcat
3_7 Hosting Spring Web with AWS (Amazon Web Service) (Creating RDS DB)
Practice_AWS) Spring AWS Deployment (A to Z) -1
[AWS] Upload war file to EC2 Ubuntu
[Spring Boot] Deploying with war (Gradle + internal/external Tomcat)
Comments
No comments yet. Be the first!
164 posts in 테크
- 2233D Gaussian Splatting vs Unreal Engine: Two Ways to Build a 3D World — and Where Each One Ships
- 222LLMs Inside Unreal Engine: The New Skills Game Developers Need in 2026
- 220Living With Claude Fable 5: How the Most Capable Model Changes the Way You Actually Work
- 219Luma's Bet: From Video Generator to a Single Model That Thinks in Pixels
- 215The Best AI Video Models in 2026: Types, Differences, and Where This Is All Going