Creating a dynamic web page using Spring internalizr (Gradle), IntelliJ, and AWS EC2 - 5-step deployment (1)
0. Let’s deploy the website
The distribution conditions I first considered were to use a service that could automate testing and distribution, and a distribution method that was a recent issue.
The previously used netlify had good conditions for automating the distribution of static web pages. Since this portfolio is a dynamic site that transmits mail, a hosting method using AWS free tier EC2 was applied.
The reason I chose AWS is because there are many companies that use AWS and I wanted to do hosting using cloud computers. I also liked that it was quick to install and easy to maintain. And let's use EC2 while avoiding being charged according to the billing system.
1. Setting up the AWS basic environment
1) Install Ubuntu Server 20.04 LTS (HVM), SSD Volume Type 64bit
First, select Amazon Machine Image (AMI). Here, you can choose a development environment suitable for your development, such as Windows or Linux, as the operating system. Be careful to select the free tier AMI here. Although it was developed on the Windows operating system, I chose Ubuntu because I wanted to try the Linux operating system.
2) Select AMI and t2.micro instance with SSD Volume Type 64bit
Select the instance type as Free Tier and click Review and Start to proceed to the next step. Here, the instance type is a virtual server that can run the application and select the free tier type.
3) Storage size 30GB
Since you can use up to 30GB in the free tier, I set it to the maximum of 30GB. (As I may find myself hosting other projects in the future)
4) 보안그룹 settings
Security groups are used to restrict server users or prevent port conflicts in the development environment. In other words, simply put, it sets up the ports to open that are necessary to use the server.
Since it does not require a separate DB, I set the port as follows, and it is possible to add or delete an instance after creation. When you select the type for the first time, there is a part where the protocol or source is automatically entered, so you can use the initial value and set restrictions if necessary while operating additional homepages.

+. Registering an Elastic IP
After instance creation is complete, 탄력적 IP is created. It has nothing to do with the key setting order. Please note that Amazon states that a small hourly fee is charged when creating an additional elastic IP for one instance or for an elastic IP connected to an instance that is not connected to an instance or is stopped.
You can connect quickly through a static IP, and a dynamic IP changes when you reconnect after stopping the instance, so an elastic IP is required.
If you look at the left sidebar of the created instance dashboard, there is a menu for creating an elastic IP.
Here, click Allocate Elastic IP Address to create an IP, and click Action to connect it to an existing instance. Because it was simple, I did not attach a separate photo.
2. Connect to instance using PuTTY
There are various types of 연결 옵션, but those suitable for local and instance operating systems are used. In this project, the local operating system is Windows, and the instance operating system is Linux.
2-1. Generate key pair
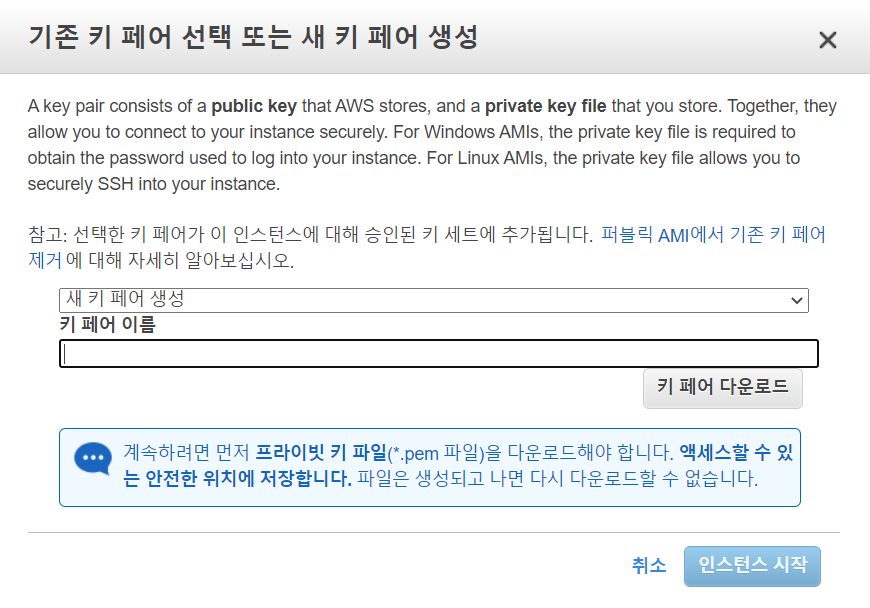
If you click Review in step 7, the instance creation and key pair creation window will appear. After creating a new key pair in Modalcha and naming it, you must store it separately and manage it carefully so that it does not get lost.
(After creating an instance, the key pair can be deleted and a new one issued.)
2-2. PuTTYgen key format conversion
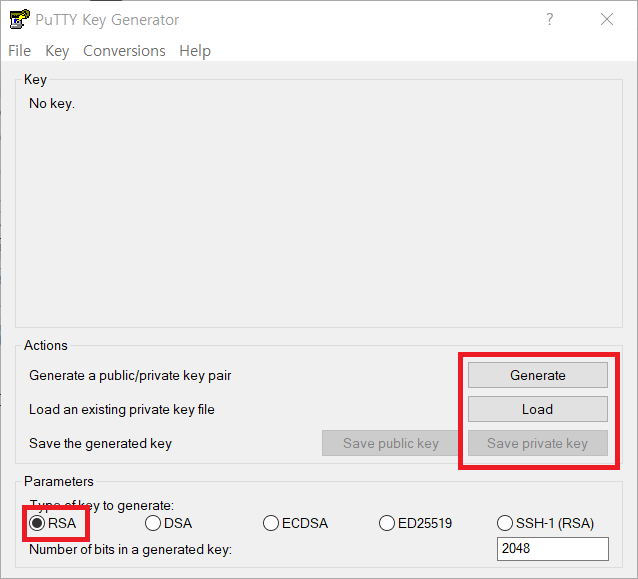
To connect to the instance, I used PuTTY recommended in the AWS guide. Once the basic installation is complete, run PuTTYgen to convert the previously downloaded key pair from .pem to .ppk format to use it to connect to the instance.
Load the .pem key and immediately save it with Save private key. Parameter values were kept in RSA type.
Later, when using PuTTYgen, there were cases where the generated and saved key did not work when connecting to Putty, so I modified this part. Let’s load and save right away!!
2-3. Using PuTTY
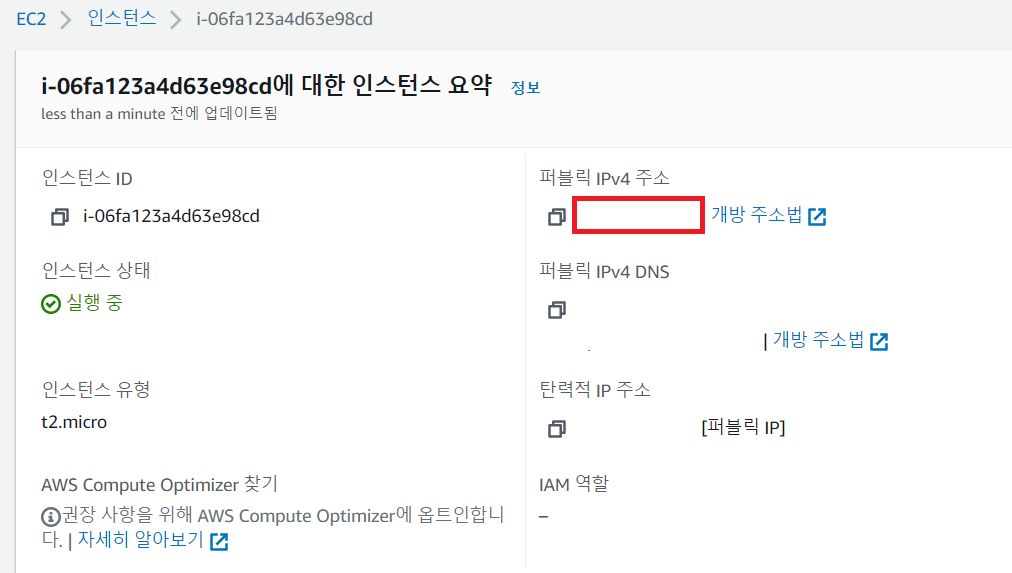
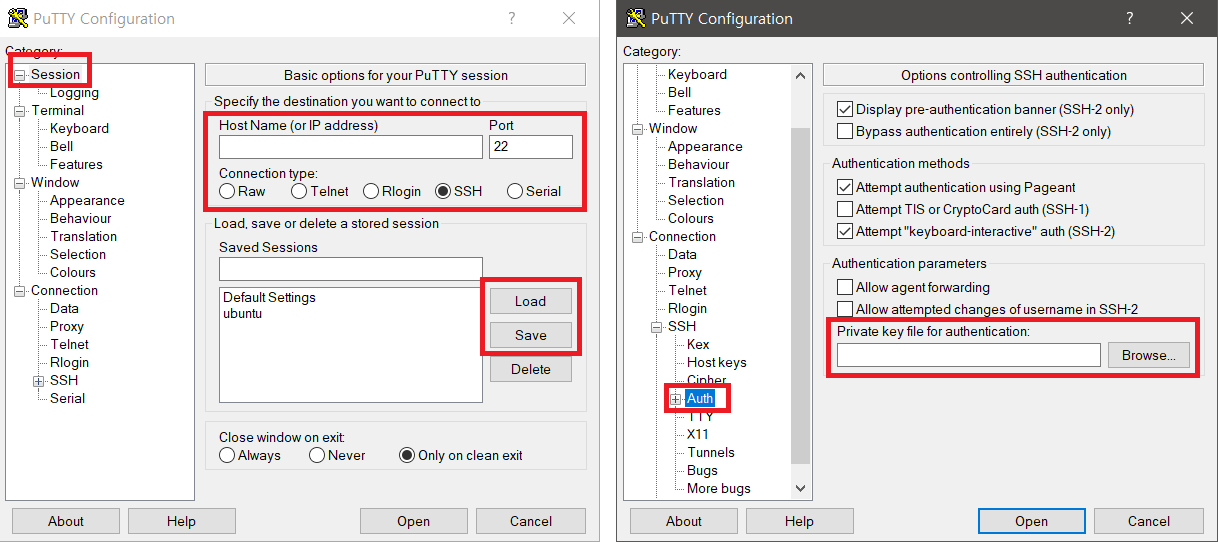
You can connect to PuTTY with the .ppk key changed for compatibility. Get the public IPv4 address from the created instance. You can save the session connection settings and easily connect later by loading. Instead of just opening here, you must find the key value in SSH>Auth, enter it, and open it to connect properly. (Key value is converted .ppk)
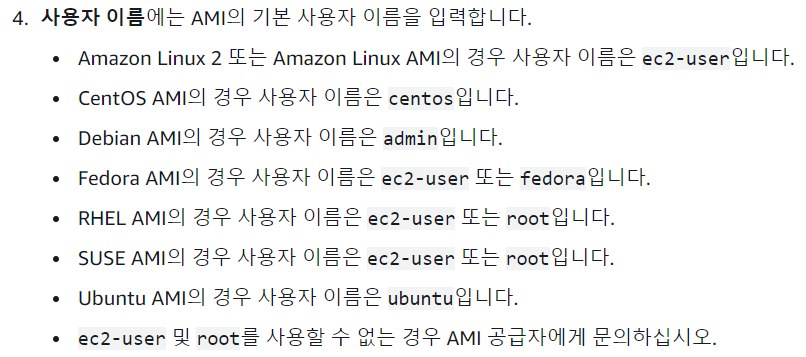
When connecting to PuTTY, the HostName value is username@publicIPaddress. Here, the user name varies depending on the instance, but is set to the AMI default user name. (Source: 아마존 가이드 )
2-4. Result window when connection is successful
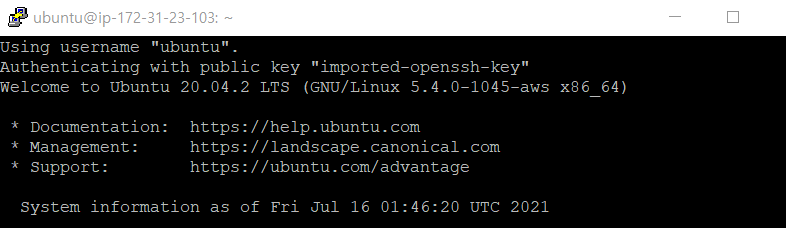
If connected correctly, the following Welcome window will appear.
If you cannot connect due to a problem with No supported authentication methods available, please refer to the following posting.
2023.03.26 - [DevOps] - [Putty, Filezila] No supported authentication methods available
2-5. Setting up PuTTY basic environment
Installs the programs necessary for the Linux operating system.
(1) First, perform the basic update.
$ sudo apt update
$ sudo apt upgrade
(2) Install and check Java + set environment variables (installs the version required for the project)
$ sudo apt-get install openjdk-11-jdk
$ sudo apt-get install openjdk-11-jre
$ java -version
$ javac -version
$ sudo update-alternatives --config java
$ which javac
$ readlink -f /usr/bin/javac
$ sudo nano /etc/profile
export JAVA_HOME=/usr/lib/jvm/java-11-openjdk-amd64
export PATH=$JAVA_HOME/bin/:$PATH
export CLASS_PATH=$JAVA_HOME/lib:$CLASS_PATH
$ sudo reboot now
$ each $JAVA_HOME
$ $JAVA_HOME/bin/javac -version
(3) Tomcat installation and permission settings
$ sudo apt-get install tomcat9
$ sudo /usr/share/tomcat9/bin/version.sh
$ sudo ufw allow 8080/tcp
$ sudo service tomcat9 start
To check, let's connect to the public IP address: 8080 that was needed when setting up PuTTY above. If Tomcat is running correctly, the message “It works!” appears.
$ sudo service tomcat9 stop
$ sudo service tomcat9 restart
Later, it will be distributed to the Tomcat webapps folder of the instance through Filezila, but permissions for the webapps folder are required to transfer and delete files.
$ sudo su
chmod -R 777 /var/lib/tomcat9/webapps
chown -R tomcat /var/lib/tomcat9/webapps
(4) Install Apache
$ sudo apt-get install apache2
$ sudo /etc/init.d/apache2 start
+
Now the basic instance environment settings are complete. If the project requires a database, proceed with additional installation of necessary programs such as MySQL.
3. Deploy with Filezila
3-1. Filezila basic settings
There are several methods, but in my case, I chose Filezila's GUI because it was easy to see, and I did not notice a big difference from WinSCP.
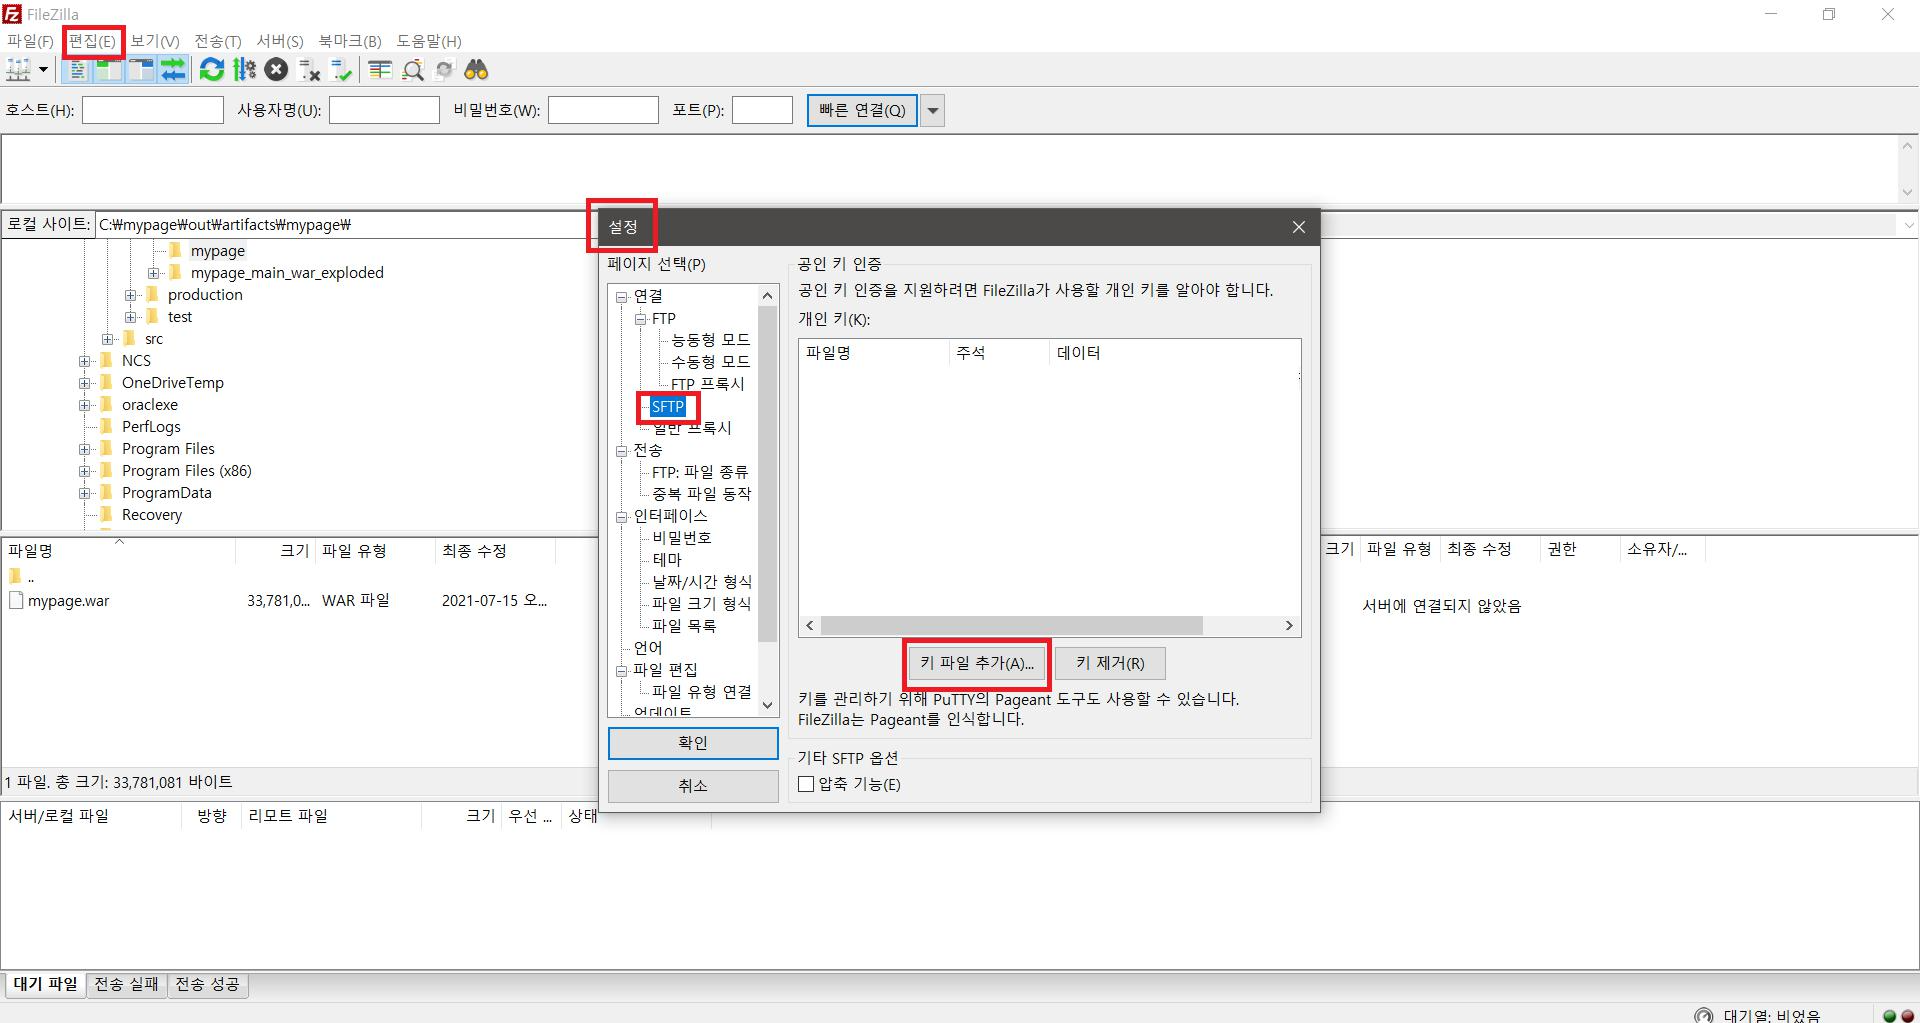
(1) Let’s register the key by calling Filezila 다운로드. Register the .ppk key in Edit>Settings.
(2) Connect the instance in File>Site Manager. Register public IP and user name. Here, the user name is the same as the PuTTY setting. Here it is ubuntu
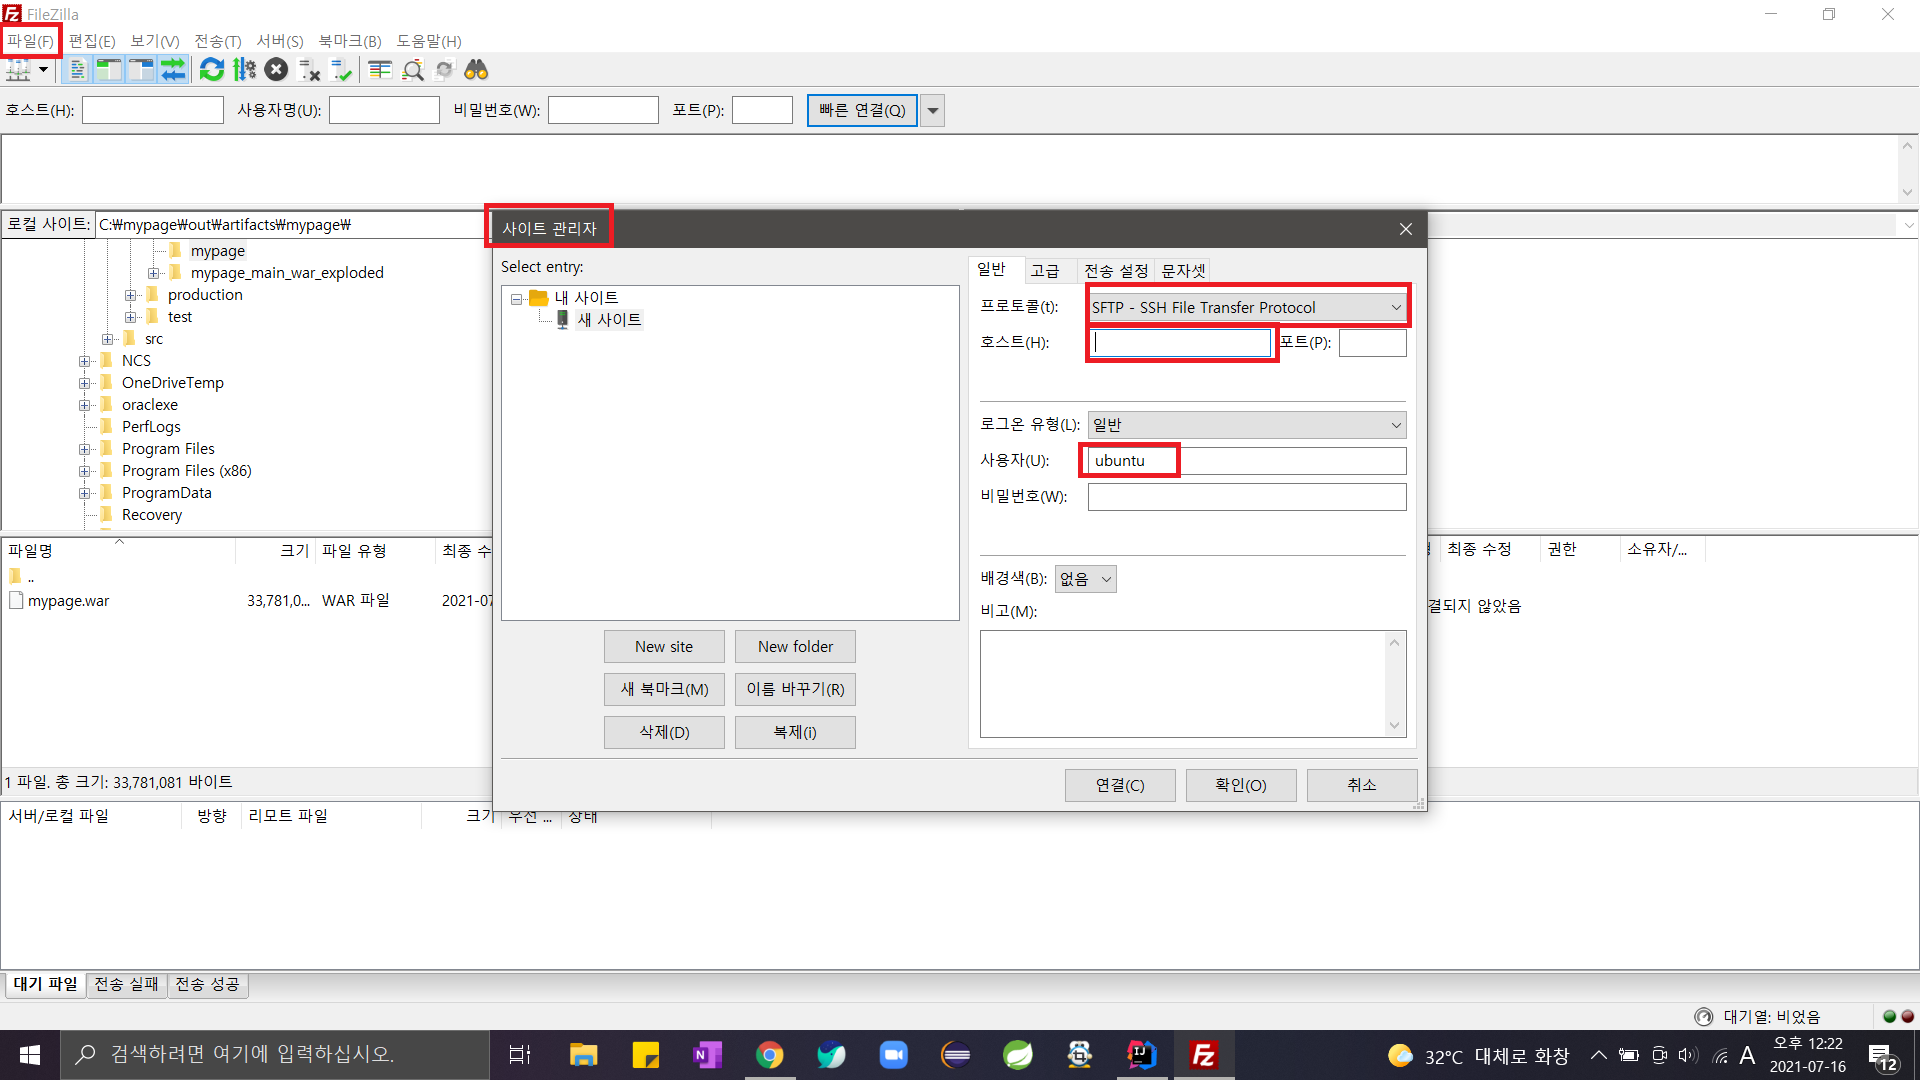
When you click connect, the instance is connected and the directory structure is visible on the right.
Amazon Elastic Compute Cloud Documentation
[AWS/아마존 웹서비스] 말도 안 되는 과금의 추억. 요금 폭탄
[Linux] putty 윈도우에서 리눅스 파일 전송 (pscp.exe)
apt-get 의 sources.list 파일 문제 해결
#2. Intellij와 AWS를 이용한 웹사이트 구축 :: IntelliJ에서 SSH연결하기
[AWS 프리티어 사용법] 4 - AWS 외부접근 설정
AWS에 Ubuntu OS를 사용하는 EC2 인스턴스 생성하기
리눅스 서버 설치기 - 3. Apache 설치 및 Tomcat 연동
Comments
No comments yet. Be the first!
164 posts in 테크
- 2233D Gaussian Splatting vs Unreal Engine: Two Ways to Build a 3D World — and Where Each One Ships
- 222LLMs Inside Unreal Engine: The New Skills Game Developers Need in 2026
- 220Living With Claude Fable 5: How the Most Capable Model Changes the Way You Actually Work
- 219Luma's Bet: From Video Generator to a Single Model That Thinks in Pixels
- 215The Best AI Video Models in 2026: Types, Differences, and Where This Is All Going